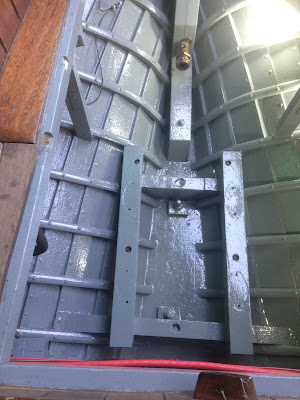
The original imperial 5/8" and 3/4" bolts were replaced with M16 and M20 and the holes were run through with long-reach drills to open them out.
New zinc-plated high-tensile hex head bolts were procured and were installed with a cotton grommet and bitumastic sealant around the outboard head and as they were driven up liquid tar paint was poured in from above to completely flood the hole and encapsulate the washers and nuts.
The pair of bolts aft of the bulkhead and under the engine were fitted longer and set onto dense plastic blocks about 25mm high in an attempt to keep them above the bilge water puddle.
On the underside of the ballast keel the bolt head recesses were filled with mortar with a waterproofer added.
The exposed faces of the lower part of the centreplate case that is only accessible from under the boat were found to be a bit worn and ragged from the effects of immersion, lack of paint and the chafe from the centreplate. A simple scraper and wire brush on long handle was used to clean the barnacles and loose stuff off and the bare timber was treated with penetrating epoxy followed by a couple of generous coats of underwater primer. A small paint roller on a long handle reached into all the corners.
The centrecase under bolts were plugged-over and the upper part of the centreplate case reassembled with newly-made sides in iroko. Sikaflex was used for all faying joints and it was here that I discovered a problem: the Sika has a problem with the underwater primer and seems to 'melt' it so that the Sika does not stick.
The centreplate case was finished off with new sill battens to help support the lower joints and cappings fore and aft. A new capping piece was fastened down onto the lower casing with bitumastic sealing strip. Epoxy sealer was used on all faces that were potentially going to get wet or to be covered in sealant. The casing was varnished and the cabin furniture re-fitted.
Moving aft the ragged stern post was tackled. The degradation of the timber was limited to the area surrounding the stern tube and the inboard section before the rabbet, only. The upper part of the stern knee was chiselled away leaving the bolts in place (which we couldn't shift but were in OK condition). The stern tube was pulled out and the plank hood-end fastenings in way of the tube were drawn out.
The damaged area was built up with thickened epoxy around the tube and new timber was cut and morticed to fit in. The existing bolts were supplemented by coachscrews and the whole lot glued firmly into place. New fastenings were driven making sure that they did not make contact with the tube. The stern tube was wrapped in PVC tape to isolate it from the surrounding timber and the inboard and outboard bearings refitted.
The bilges were primed and painted again.
'Enfys' centreplate had been away having the pivot bolt hole closed up and re-drilled, blasted and hot-dip galvanised. It was wedged upright on a modified pallet and the yacht was lifted over it, jacked into place, pivot bolt fitted and wire connected and wound onto the winch.
The engine was serviced, filters changed, filled with gear and engine oil and was slung back into place. It was lined up with the re-installed propeller shaft and the exhaust, fuel tank, cooling pipes, control cables and wiring harness re-connected. A splash of diesel in the tank, bled and she was running!
Finally we took down the winter cover and cleared the boat of tools and surplus materials ready for loading. In between times I had de-rusted the bilge keels and primed them and applied two coats of antifoul.
'Enfys' was loaded back onto the truck and was taken back to Saundersfoot where she was unloaded direct to the sand next to the slipway whilst the tide was out. Her mast was re-stepped and when at last the tide returned she finally floated.


No comments:
Post a Comment